 Save to Pinterest
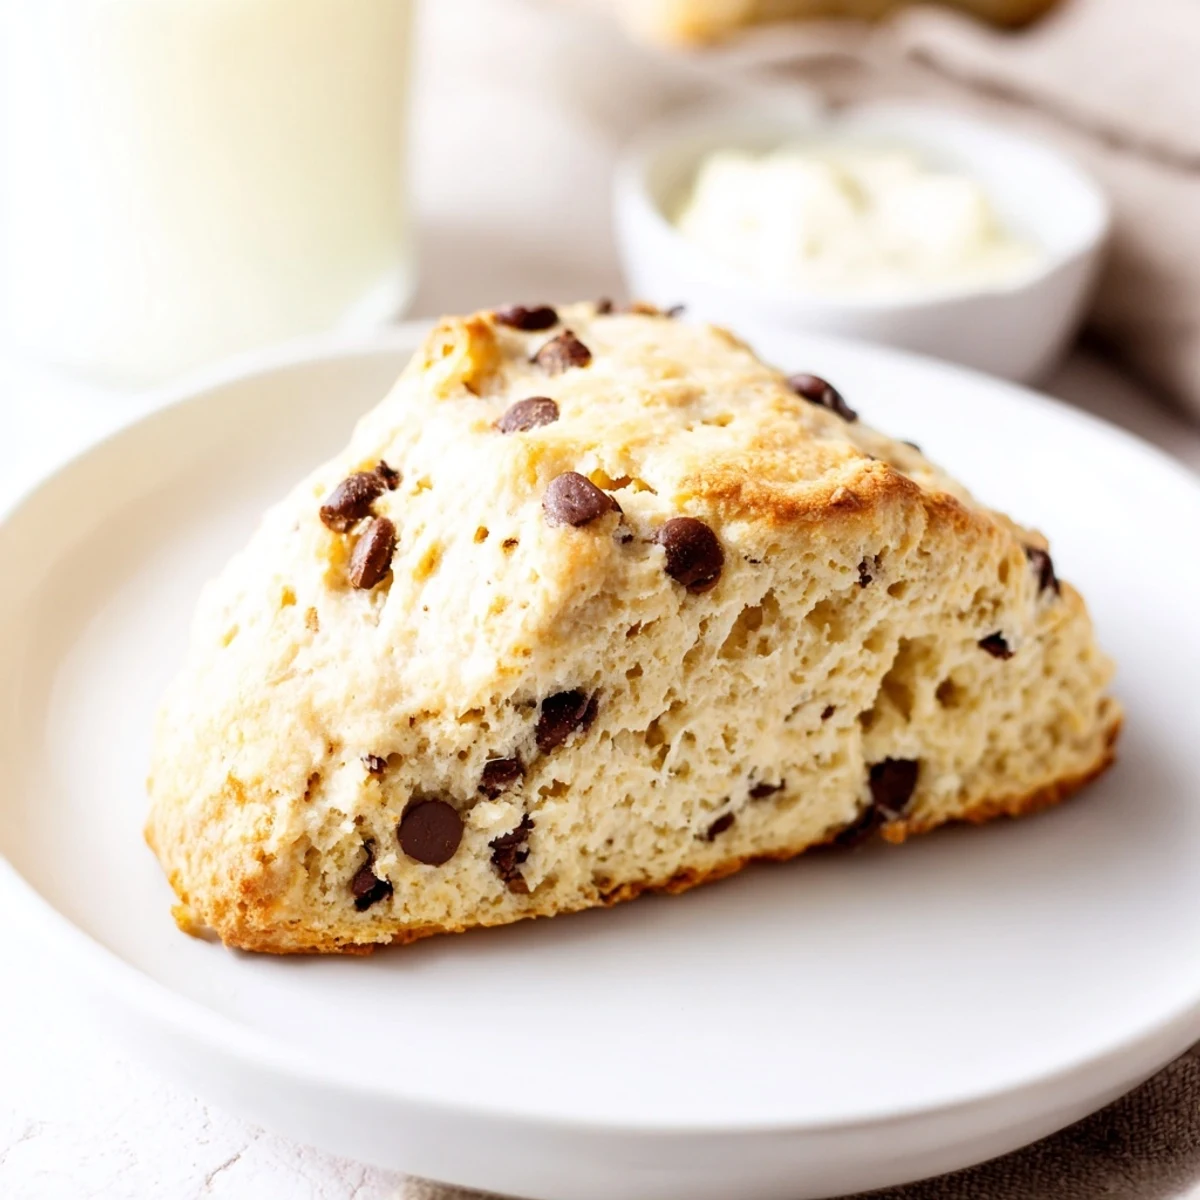
 These delightful scones offer a tender, buttery crumb studded generously with rich chocolate chips. The preparation is straightforward: combine dry ingredients like flour, sugar, baking powder, and salt. Cut in cold butter until crumbly. A simple blend of heavy cream, egg, and vanilla extract is then added, bringing the dough together without overmixing. Finally, fold in the chocolate chips. The dough is gently patted into a round, cut into classic wedges, brushed with cream for a golden finish, and baked until perfectly golden. Enjoy these warm, fragrant treats for breakfast or as a satisfying afternoon indulgence.
The aroma of warm, buttery chocolate chip scones has a way of instantly transporting me to a cozy, sun-drenched morning, even if it&s pouring rain outside. I remember the slight panic of a last–minute brunch invitation, and this recipe, with its simple elegance, became my unexpected savior. The sheer joy of pulling these golden beauties from the oven, filling the whole house with their sweet scent, felt like a small, triumphant secret. It&s a quick comfort that feels deeply indulgent.
One brisk autumn weekend, a few friends dropped by unexpectedly, and my kitchen quickly became a flurry of activity. I can still hear the clinking of mugs and the easy laughter as these scones baked, their warmth a perfect counterpoint to the crisp air just outside the window. We ate them almost straight from the oven, huddled around the kitchen island, each bite a little piece of homemade bliss. It&s those impromptu moments that truly make a recipe a keeper.
Ingredients
- All–purpose flour: This is your foundation; don&t overmix it once wet, or you&ll end up with tough scones.
- Granulated sugar: Just enough to add a hint of sweetness without overwhelming the buttery goodness.
- Baking powder: The magic behind that lovely rise, ensuring your scones are light and fluffy.
- Salt: A crucial balancer, it enhances all the other flavors and prevents the scones from tasting flat.
- Unsalted butter, cold and cut into cubes: This is non–negotiable for tender, flaky scones; warm butter melts too quickly and creates a dense texture.
- Heavy cream, plus extra for brushing: Provides richness and moisture, making the scones incredibly tender, and a brush of it on top guarantees a beautiful golden crust.
- Large egg: Acts as a binder and adds a touch more richness and structure to the dough.
- Vanilla extract: A classic flavor enhancer that complements the chocolate beautifully and adds a warm, inviting aroma.
- Chocolate chips (semi–sweet or milk): The star of the show! Choose your favorite – I usually go for semi–sweet for a nice contrast to the scone&s sweetness.
Instructions
- Get Your Oven Singing & Prep Your Pan:
- First things first, let&s get that oven preheated to a warm 400°F (200°C) so it&s ready for action. While it heats up, grab a trusty baking sheet and lay down some parchment paper – it makes cleanup a breeze.
- Whisk the Dry Magic:
- In your biggest mixing bowl, combine the flour, sugar, baking powder, and salt. Give them a good whisk until they&re all friends and evenly distributed.
- Work in That Cold Butter:
- Now, for the critical step: add your cold butter cubes to the dry mixture. Use a pastry cutter, or your fingertips if you&re feeling brave and quick, to cut the butter into the flour until it resembles coarse crumbs, like pebbly sand.
- The Wet Ensemble:
- In a separate, smaller bowl, whisk together the heavy cream, egg, and vanilla extract until they&re nicely combined.
- Bring Them Together Gently:
- Pour the wet ingredients into the dry mixture. Use a spatula or your hands to gently stir and fold until just combined – resist the urge to overmix; a shaggy dough is a happy dough.
- Fold in the Chocolatey Dreams:
- Gently fold in your chocolate chips. Remember, less is more when it comes to mixing scone dough; you want to preserve those tender flakes.
- Shape & Cut Your Beauties:
- Turn the dough out onto a lightly floured surface. Gently pat it into a round disc, about 1 inch (2.5 cm) thick, without overworking it. Then, using a sharp knife or bench scraper, cut the disc into 8 wedges and carefully transfer them to your prepared baking sheet, giving them a little breathing room.
- Brush for Golden Perfection:
- For that gorgeous, golden–brown finish, lightly brush the tops of your scones with a little extra heavy cream.
- Bake Until Golden:
- Pop them into the preheated oven and bake for about 16–18 minutes, or until their tops are beautifully golden brown and they smell absolutely divine.
- Cool and Enjoy:
- Let them cool slightly on the baking sheet for a few minutes before moving them to a wire rack. They&re utterly irresistible warm!
 Save to Pinterest
 There was one particularly grey, drizzly morning when my younger niece was feeling a bit down about a missed field trip. I suggested we make "magic scones," and the way her face lit up as the chocolate chips melted into gooey puddles was priceless. We sat by the window, dipping them into warm milk, and it felt like we had conjured a little pocket of sunshine right there in the kitchen.
Making Them Your Own
This recipe is such a fantastic base, truly. I&ve had so much fun playing around with it over the years, depending on my mood or what&s in the pantry. Adding a half teaspoon of orange zest to the dry ingredients, as mentioned in the original notes, completely transforms them into a bright, citrusy dream, especially with dark chocolate chips. Sometimes, when I&m feeling adventurous, I&ll swap out half the chocolate chips for dried cranberries or even a handful of chopped toasted nuts for an extra layer of texture.
The Art of Serving & Storing
While these chocolate chip scones are undeniably at their absolute best when they&re still warm from the oven, cooling slightly just enough so they don&t burn your fingers, they do hold up well for a couple of days. I usually keep them in an airtight container on the counter, but let&s be honest, they rarely last that long! For an extra decadent treat, a dollop of clotted cream or even just some good quality butter alongside a hot cup of tea is pure bliss.
My Go–To Scone Wisdom
Achieving those perfect, light, and flaky scones really comes down to a few simple principles that, once mastered, will make you feel like a scone–baking wizard. Don&t be afraid to keep that dough cold – if your kitchen is warm, pop the shaped scones into the fridge for 15 minutes before baking. The cold butter will create more steam, resulting in a better rise and a flakier texture. Also, when cutting the dough, use a sharp knife and press straight down rather than sawing; this helps the scones rise evenly.
- Flour your hands lightly when handling the dough to prevent sticking, but don&t add too much extra flour to the dough itself.
- For the prettiest tops, ensure your cream brush is just a light glaze, not a heavy coating.
- Always use good quality chocolate chips; they truly make a difference in the final flavor.
 Save to Pinterest
 There&s something incredibly satisfying about creating these simple, comforting treats from scratch. So go ahead, bake a batch, and let the comforting warmth of homemade chocolate chip scones fill your home and your heart.
Common Questions
- → How do I ensure my scones are tender and flaky?
-
To achieve tender and flaky scones, it's crucial to use very cold butter and handle the dough as little as possible. Overmixing develops gluten, which can lead to a tough texture. The cold butter creates steam pockets as it bakes, resulting in a light crumb.
- → Can I substitute the chocolate chips with other ingredients?
-
Yes, you can! Feel free to replace chocolate chips with dried fruits like raisins or cranberries, nuts such as walnuts or pecans, or even a different type of chocolate. Just ensure the total quantity remains similar.
- → What's the best way to store these scones?
-
These scones are best enjoyed fresh, ideally on the day they are baked. If you have leftovers, store them in an airtight container at room temperature for up to 2 days. For longer preservation, they can be frozen for up to a month and then reheated.
- → Why is it important to use cold butter?
-
Using cold butter prevents it from melting into the flour too quickly. As the cold butter melts in the hot oven, it releases steam, which creates air pockets within the dough, leading to a light, airy, and flaky texture characteristic of good scones.
- → Can I make a larger batch?
-
Yes, you can easily double or even triple the ingredients to make a larger batch. Just ensure you use appropriately sized bowls and baking sheets, and be mindful not to overwork the dough when scaling up.
- → Is there a trick to cutting perfect scones?
-
For clean cuts, use a sharp knife or a pastry cutter and press straight down without twisting. This prevents sealing the edges, which allows the scones to rise better. Chilling the dough briefly before cutting can also make it easier to handle.
