 Save to Pinterest
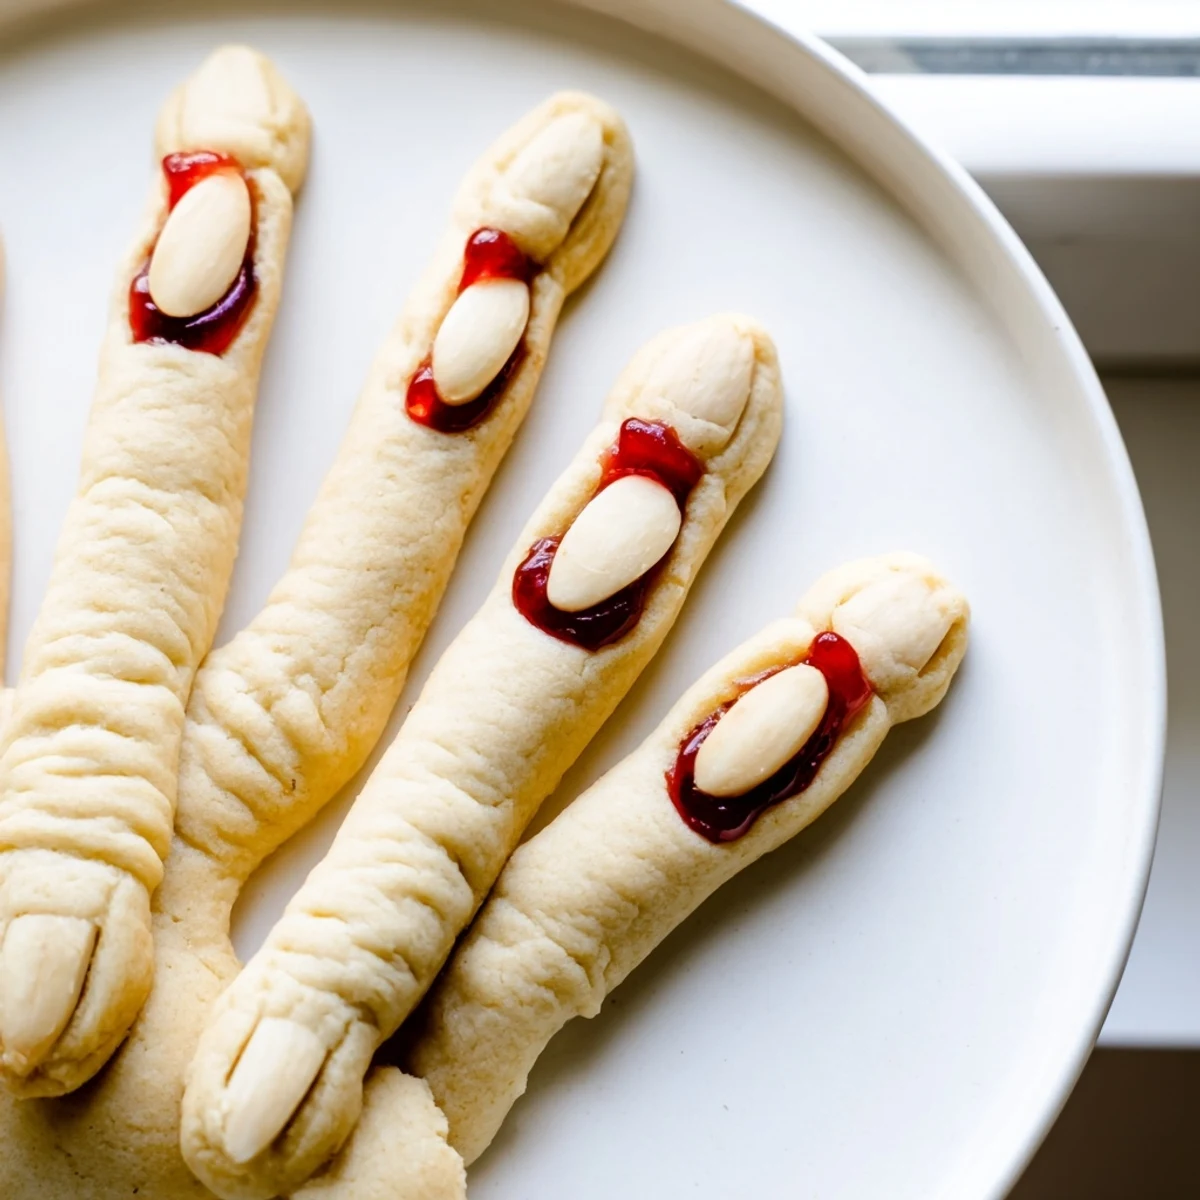
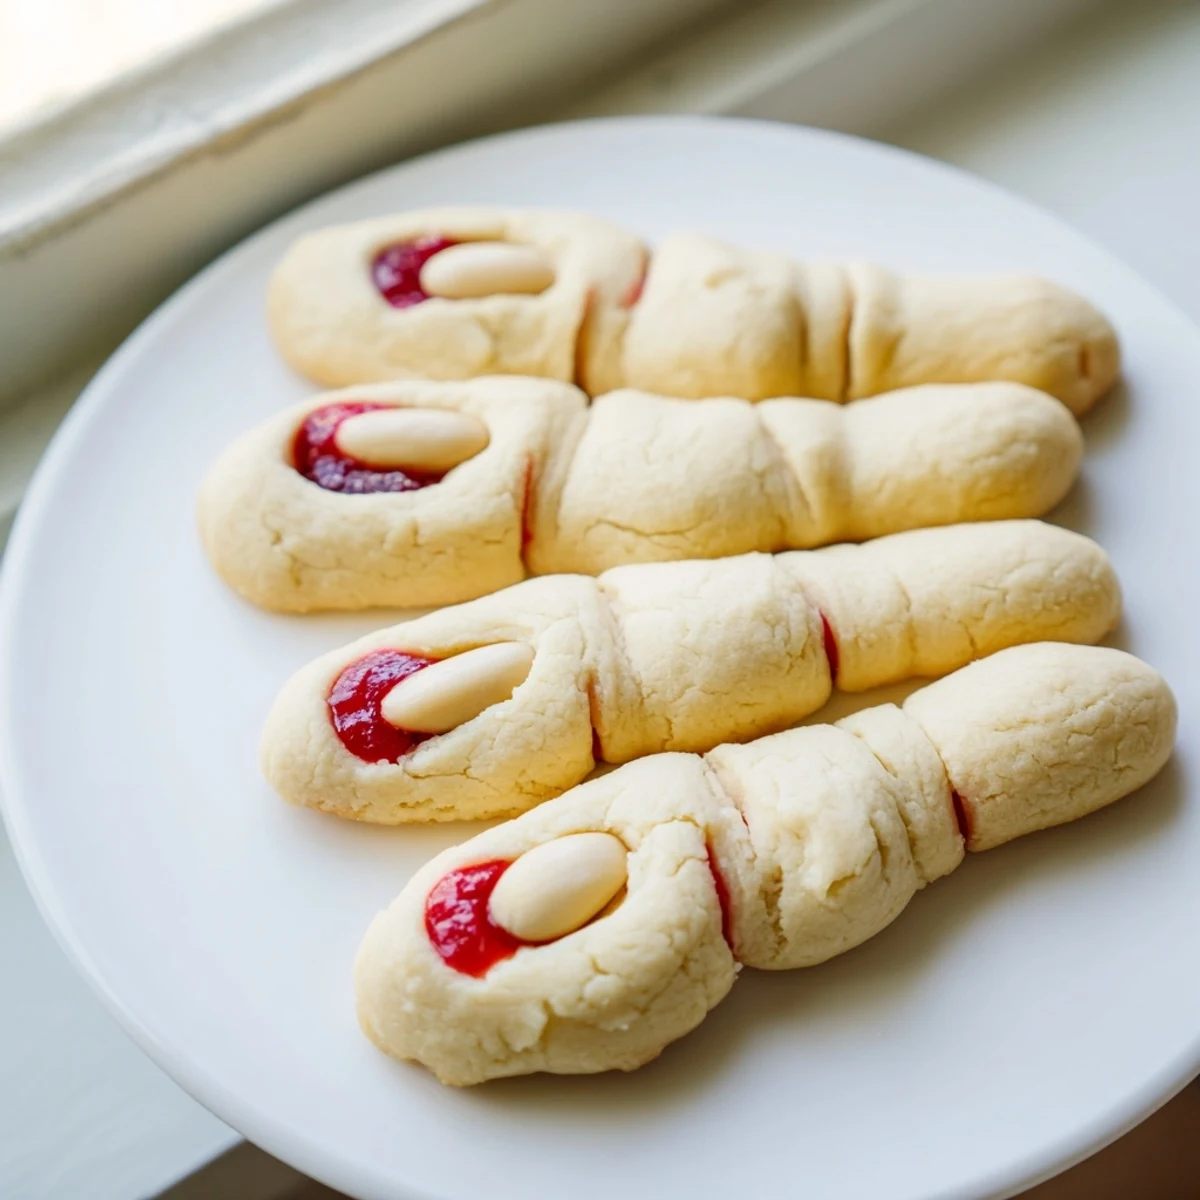
 These spooky witch finger cookies combine buttery almond-flavored dough with creepy realistic details. Each finger-shaped cookie features knuckle lines and a blanched almond fingernail with a gruesome red jam or gel coloring effect. Perfect for Halloween parties, these frighteningly delicious treats come together in just 45 minutes and yield 24 cookies.
Last Halloween, my kitchen looked like a crime scene with flour everywhere and my sister accidentally squeezing red gel all over her thumb instead of the cookie. We laughed so hard we had to sit on the floor, and these witch fingers became the hit of the party that year.
My six year old nephew helped me shape the knuckles last year and made every single finger look like it was giving the thumbs up. Nobody questioned the art direction because they were too busy grabbing them off the platter.
Ingredients
- Unsalted butter: Softening it to room temperature makes all the difference between crumbly dough and fingers that actually hold their shape in the oven
- Almond extract: This is what gives the cookies their authentic slightly nutty flavor that pairs perfectly with the sweetness
- Blanched almonds: Whole ones work best for fingernails because they have that natural slightly curved shape that looks disturbingly realistic
- Red gel food coloring: The gel version gives you that freshly made bloody look without making the cookies soggy like liquid coloring would
Instructions
- Prep your baking station:
- Preheat that oven to 325°F and line your baking sheets with parchment paper now so you are not scrambling later when the dough is ready
- Cream butter and sugar:
- Beat them together until the mixture looks pale and fluffy which usually takes about 3 minutes of serious mixing
- Add the egg and extracts:
- Crack in that egg and pour in both the vanilla and almond extract then keep mixing until everything is combined
- Whisk dry ingredients:
- In a separate bowl combine the flour baking powder and salt so they are evenly distributed before they hit the wet mixture
- Combine the dough:
- Gradually mix in the dry ingredients just until a dough forms because overmixing will make your fingers tough instead of tender
- Shape the fingers:
- Scoop about 1 tablespoon of dough and roll it between your palms into logs about 3 to 4 inches long making them slightly thinner at one end like real fingers
- Create knuckle details:
- Use a knife to gently press lines where knuckles would be then press a blanched almond firmly into the thicker end for the fingernail
- Bake until golden:
- Arrange them on your prepared sheets leaving about 2 inches between each finger and bake for 18 to 20 minutes until they are lightly golden
- Add the bloody effect:
- Carefully remove each almond squeeze a little red gel or jam into the nail bed and press the almond back in place
- Cool completely:
- Let them finish cooling on a wire rack because the jam needs to set and the cookies need to firm up before serving
 Save to Pinterest
 My friend actually refused to try one for twenty minutes convinced I had served actual fingers until she finally took a bite and then ate three more while complaining about how creepy they looked.
Making Them Look Extra Spooky
Divide a small portion of dough and tint it with green or gray food coloring then mix it back into the plain dough just enough to create mottled witchy skin tones. Some of my best looking fingers came from not overmixing the colors so they had that slightly unnatural blotchy effect.
Serving Ideas That Up The Fear Factor
Arrange the cookies reaching out from a hollowed out pumpkin or pile them in a basket lined with fake cobwebs. Last year I stuck some into a chocolate graveyard cake and people could not decide whether to be impressed or genuinely concerned.
Storage And Make Ahead Tips
You can freeze the shaped raw fingers on a baking sheet then transfer them to a bag and bake straight from frozen which just adds a couple minutes to the baking time. The finished cookies keep well in an airtight container for up to five days though the bloody effect looks freshest within the first two.
- Tint your dough the day before and let it chill overnight which makes it easier to shape into realistic fingers
- Apply the red gel right before serving so it looks freshly gruesome
- Keep the blanched almonds in a separate container until ready to use so they stay crisp
 Save to Pinterest
 These have become the one Halloween treat my friends actually request months in advance because they are just as delicious as they are disturbing to look at.
Common Questions
- → How do I make the cookies look more realistic?
-
Create knuckle lines by gently pressing a knife across the dough finger. Press a blanched almond firmly at one end for the fingernail. After baking, remove the almond, add red food coloring or jam underneath, then replace the almond for a bloody effect.
- → Can I make these cookies ahead of time?
-
Yes, you can prepare the dough up to 2 days in advance and store it refrigerated. Shape and bake when ready. Baked cookies stay fresh for 4-5 days in an airtight container at room temperature.
- → What can I use instead of almonds for the fingernails?
-
You can use sliced almonds, cashew halves, or even create fingernails from white candy melts or fondant. For nut allergies, consider using sunflower seeds or pumpkin seeds as alternatives.
- → How do I prevent the cookies from spreading too much?
-
Ensure your butter is softened but not melted. Chill the shaped dough for 15-20 minutes before baking if your kitchen is warm. This helps maintain the finger shape during baking.
- → Can I freeze the dough or baked cookies?
-
Freeze shaped, uncooked fingers on a baking sheet until firm, then transfer to a freezer bag for up to 3 months. Bake from frozen, adding 2-3 minutes to the baking time. Baked cookies freeze well for 2-3 months.
