 Save to Pinterest
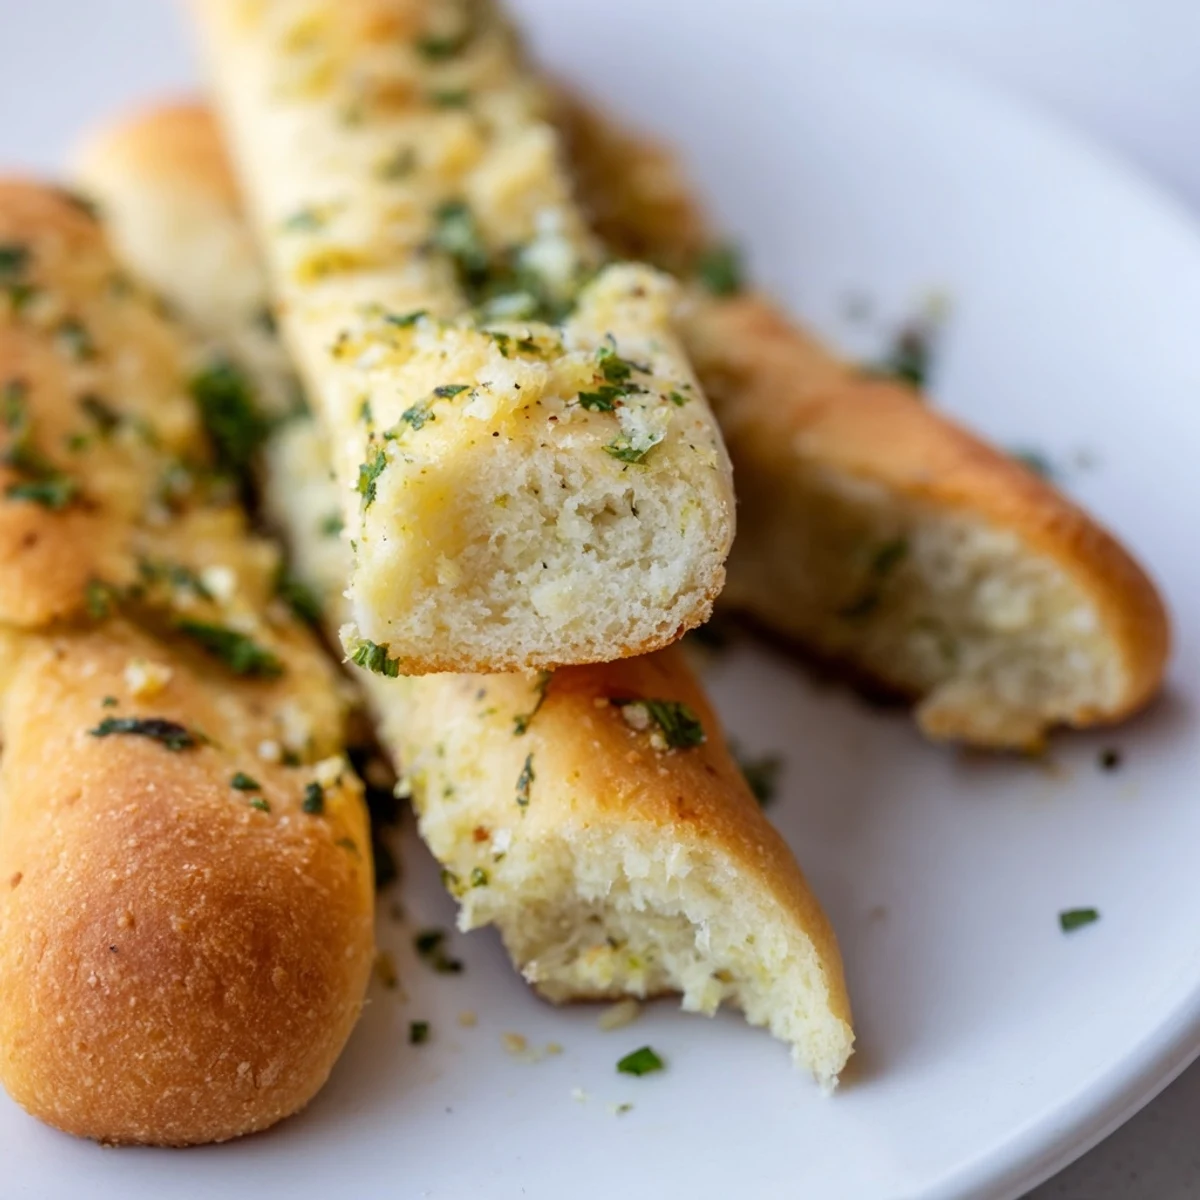
 These soft, fluffy breadsticks feature a tender yeast dough brushed generously with melted garlic butter and fresh parsley. The dough rises for about an hour, creating that irresistible airy texture inside while developing a light golden crust. The magic happens when you brush the warm baked sticks with buttery garlic mixture—the garlic infuses beautifully into the surface, creating that aromatic Italian-American classic.
Perfect alongside minestrone, Caesar salad, or as a starter with marinara dipping sauce. Each hand-rolled brea dstick bakes to golden perfection in just 12-15 minutes.
The smell of garlic butter hitting fresh baked bread is the kind of thing that makes everyone wander into the kitchen asking when dinner is ready. I started making these breadsticks during a particularly cold January when soup was on constant rotation and I needed something to dunk. They disappeared so fast the first time that I started doubling the batch out of self preservation. Now they are the dish people request before they even know what the main course is.
One Friday night my neighbor knocked on the door to return a borrowed casserole dish right as I was pulling a tray of these from the oven. She ended up sitting at the kitchen counter eating three of them standing up while telling me about her week. I sent her home with the rest of the batch and a scribbled recipe on the back of an envelope.
Ingredients
- All-purpose flour (2 cups/250 g): Regular unbleached flour works perfectly here, and you do not need bread flour despite what some recipes insist.
- Warm water (1 cup/120 ml): Aim for about 110 degrees Fahrenheit or roughly the temperature of a warm bath, because water that is too hot will kill the yeast instantly.
- Instant yeast (1.5 tsp/5 g): Instant yeast eliminates the need for a separate proofing step, though active dry yeast works if that is what you have on hand.
- Sugar (1 tsp/5 g): Just enough to wake up the yeast and give the dough the faintest hint of sweetness.
- Salt (0.75 tsp/4 g): Do not skip this or the breadsticks will taste flat and sad no matter how much garlic butter you pile on.
- Unsalted butter, softened (2 tbsp/28 g): This goes into the dough itself for tenderness and a richer crumb.
- Unsalted butter, melted (3 tbsp/42 g): Reserved for the garlic butter finish that makes these irresistible.
- Garlic, finely minced (2 cloves): Fresh garlic only, because the jarred stuff tastes metallic once it hits hot bread.
- Fresh parsley, finely chopped (1 tbsp, optional): Adds a pop of green and a fresh bite that balances all that rich butter.
- Salt (0.5 tsp): For the garlic butter layer, keeping it distinct from the dough salt.
Instructions
- Wake up the yeast:
- Pour the warm water into a large bowl, stir in the sugar and yeast, and let it sit undisturbed for about five minutes until the surface looks frothy and alive. If nothing happens after ten minutes your yeast is dead and you need to start over with a fresh packet.
- Build the dough:
- Add the flour, salt, and softened butter to the foamy yeast mixture, then stir until everything comes together into a shaggy mass. Turn it out onto a lightly floured counter and knead for seven to eight minutes until the dough feels smooth and springs back when you press it with a finger.
- Let it rise:
- Place the dough in a lightly greased bowl, cover it with a kitchen towel, and tuck it somewhere warm for about an hour until it has doubled in size. The inside of a turned off oven with the light switched on works beautifully if your kitchen is drafty.
- Shape the breadsticks:
- Punch the dough down gently, divide it into twelve equal pieces, and roll each one into a rope about seven or eight inches long. Set them on a parchment lined baking sheet leaving a little space between each one for puffing.
- Second rise:
- Loosely drape a towel over the shaped breadsticks and let them rest for another twenty to thirty minutes while you preheat the oven to 400 degrees Fahrenheit. They should look noticeably plumper but not necessarily doubled again.
- Bake until golden:
- Slide the tray into the oven and bake for twelve to fifteen minutes, watching for a light golden color on top. The bottoms should sound slightly hollow when tapped.
- Make the garlic butter:
- While the breadsticks bake, stir together the melted butter, minced garlic, salt, and parsley in a small bowl until fragrant. The warmth of the butter blooms the garlic into something absolutely head turning.
- Finish and serve:
- Pull the breadsticks from the oven and immediately brush them generously with the garlic butter while they are still piping hot. The butter soaks into the crust and creates a glossy, fragrant finish that demands to be eaten right away.
 Save to Pinterest
 Somewhere along the way these breadsticks stopped being a side dish and became the reason people show up early to dinner at my house. There is something about pulling a tray of warm, buttery bread from the oven that turns an ordinary weeknight into a small celebration.
Getting Creative with Variations
Sprinkle grated Parmesan over the breadsticks right before they go into the oven for a cheesy, salty crust that takes them into pizza stick territory. You can also swap the parsley for chopped fresh basil or oregano depending on what you are serving them alongside.
What to Serve Alongside
These breadsticks were practically designed for dunking into a bowl of tomato soup or alongside a big chopped salad with vinaigrette. A small dish of warm marinara sauce on the side for dipping turns them into an appetizer that disappears before the main event even hits the table.
Storing and Reheating Leftovers
If you somehow end up with leftovers, they keep well in an airtight bag at room temperature for up to two days. Reheating them in a 350 degree Fahrenheit oven for about five minutes brings back the soft interior and crisps the exterior better than a microwave ever could.
- Do not store them in the refrigerator because the cold dries out the crumb and makes them stale faster.
- Freeze baked breadsticks wrapped tightly in foil for up to one month, then reheat directly from frozen.
- Always make extra garlic butter for brushing on after reheating because it makes them taste freshly baked.
 Save to Pinterest
 Once you make these garlic breadsticks from scratch, the frozen ones from the store aisle will never satisfy you again. Share them generously, because holding out on people once they smell that garlic butter is just cruel.
Common Questions
- → How do I know when the dough has risen enough?
-
The dough is ready when it has doubled in size, typically about 1 hour. Gently press two fingers into the dough—if the indentation remains, your dough has properly risen and is ready to shape.
- → Can I make these ahead of time?
-
Yes! Shape the breadsticks, place on your baking sheet, and refrigerate overnight. Let them sit at room temperature for 30 minutes before baking. Alternatively, bake fully and reheat at 350°F for 5-10 minutes.
- → Why brush with garlic butter after baking?
-
Brushing warm breadsticks with garlic butter immediately after baking allows the butter to melt into the surface while the garlic flavor penetrates the crust. This technique ensures maximum flavor absorption without burning the garlic during baking.
- → What other herbs work well?
-
Fresh basil, oregano, or rosemary all complement the garlic beautifully. You can also add 1 teaspoon of Italian seasoning blend for a classic herb mix. Dried herbs work too—use about 1 teaspoon dried versus 1 tablespoon fresh.
- → Can I freeze these breadsticks?
-
Absolutely! Bake completely, cool, then freeze in an airtight container for up to 3 months. Reheat from frozen at 375°F for 8-10 minutes. You can also freeze unbaked shaped sticks—let thaw and rise 1 hour before baking.
- → How do I get extra cheesy breadsticks?
-
Sprinkle ½ cup grated Parmesan or mozzarella over the shaped breadsticks during the last 5 minutes of baking. The cheese will melt and bubble beautifully while the breadsticks finish cooking.
