 Save to Pinterest
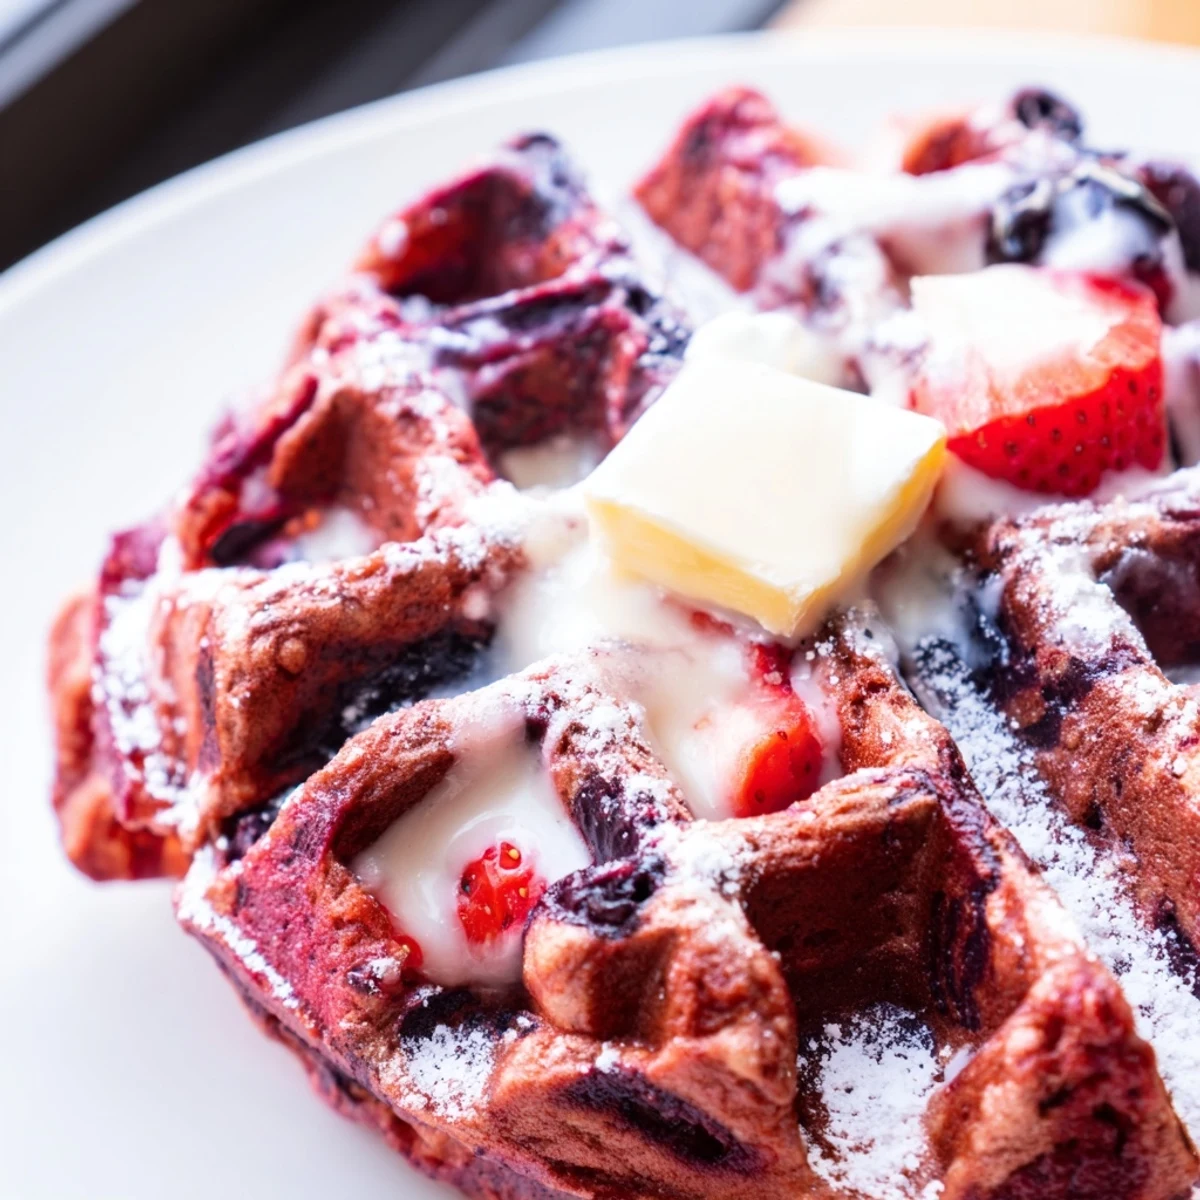
 These stunning waffles combine classic vanilla batter with a vibrant red velvet swirl, creating breakfast-worthy edible art. The technique involves preparing two batters—one plain vanilla, another enriched with cocoa and red food coloring—then layering them in your waffle iron for that signature marbled appearance.
The result is crisp, golden exteriors giving way to tender, lightly cocoa-scented interiors. Perfect for special occasion brunches or when you want to elevate weekend breakfast from ordinary to extraordinary. Serve with cream cheese glaze or maple syrup for the ultimate indulgent finish.
The first time I made these waffles, my kitchen looked like a crime scene. Red food coloring everywhere. But when I lifted that waffle iron lid and saw those swirling ruby and cream patterns, all the mess felt worth it. My daughter actually gasped. Now they are her most requested birthday breakfast request.
Last summer I made these for a Fourth of July brunch. People kept asking where I bought them. When I explained they were homemade, my friend Sarah actually asked for the recipe right then at the table. Something about red velvet just makes people feel celebrated.
Ingredients
- 2 cups all-purpose flour: Forms the tender base structure of your waffle
- 2 tbsp granulated sugar: Just enough sweetness to balance the tangy buttermilk
- 2 tsp baking powder: Gives you that signature waffle lift
- 1/2 tsp baking soda: Works with buttermilk for extra fluffiness
- 1/4 tsp salt: Enhances all the flavors without making them taste salty
- 1 3/4 cups buttermilk: The secret to tender, tangy waffles
- 2 large eggs: Room temperature eggs incorporate better into the batter
- 4 tbsp unsalted butter, melted and slightly cooled: Adds richness and helps waffles crisp up beautifully
- 1 tsp vanilla extract: Pure vanilla makes the plain batter sing
- 2 tbsp unsweetened cocoa powder: Deepens the red velvet flavor and adds complexity
- 1 tbsp red food coloring: Gel coloring gives more vibrant results than liquid
Instructions
- Whisk the dry foundation:
- In a large bowl, combine flour, sugar, baking powder, baking soda, and salt until well blended
- Mix the wet ingredients:
- Whisk buttermilk, eggs, melted butter, and vanilla extract in another bowl until completely smooth
- Combine gently:
- Fold wet mixture into dry ingredients just until combined, some small lumps are perfectly fine
- Create the two batters:
- Divide batter evenly between two bowls, then add cocoa powder and red food coloring to one bowl
- Heat your waffle iron:
- Preheat according to manufacturer instructions and lightly grease with oil or cooking spray
- Make the marble magic:
- Dollop alternating spoonfuls of red velvet and vanilla batters onto the hot iron
- Swirl gently:
- Use a chopstick or butter knife to lightly swirl the batters together for a marbled effect
- Cook to perfection:
- Close lid and cook for 3 to 5 minutes until golden and crisp
- Serve warm:
- Top with cream cheese glaze, maple syrup, or fresh fruit while still hot
 Save to Pinterest
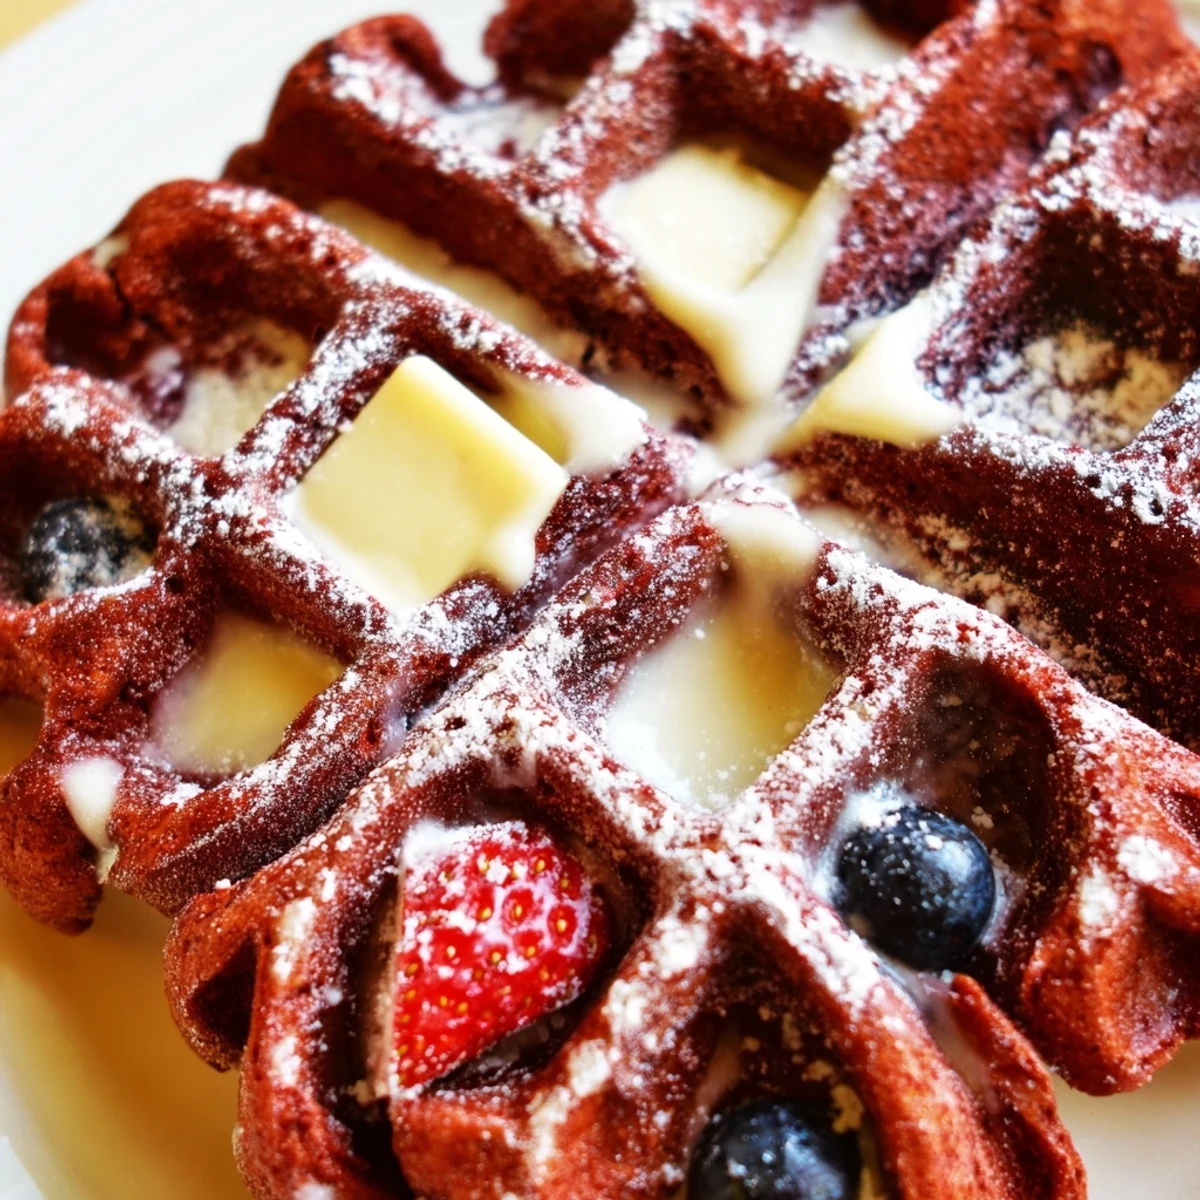
 My grandmother never understood red velvet anything. She called it bakery food. But after trying these waffles with cream cheese glaze, she asked for seconds. Sometimes the most nostalgic flavors just need a new form.
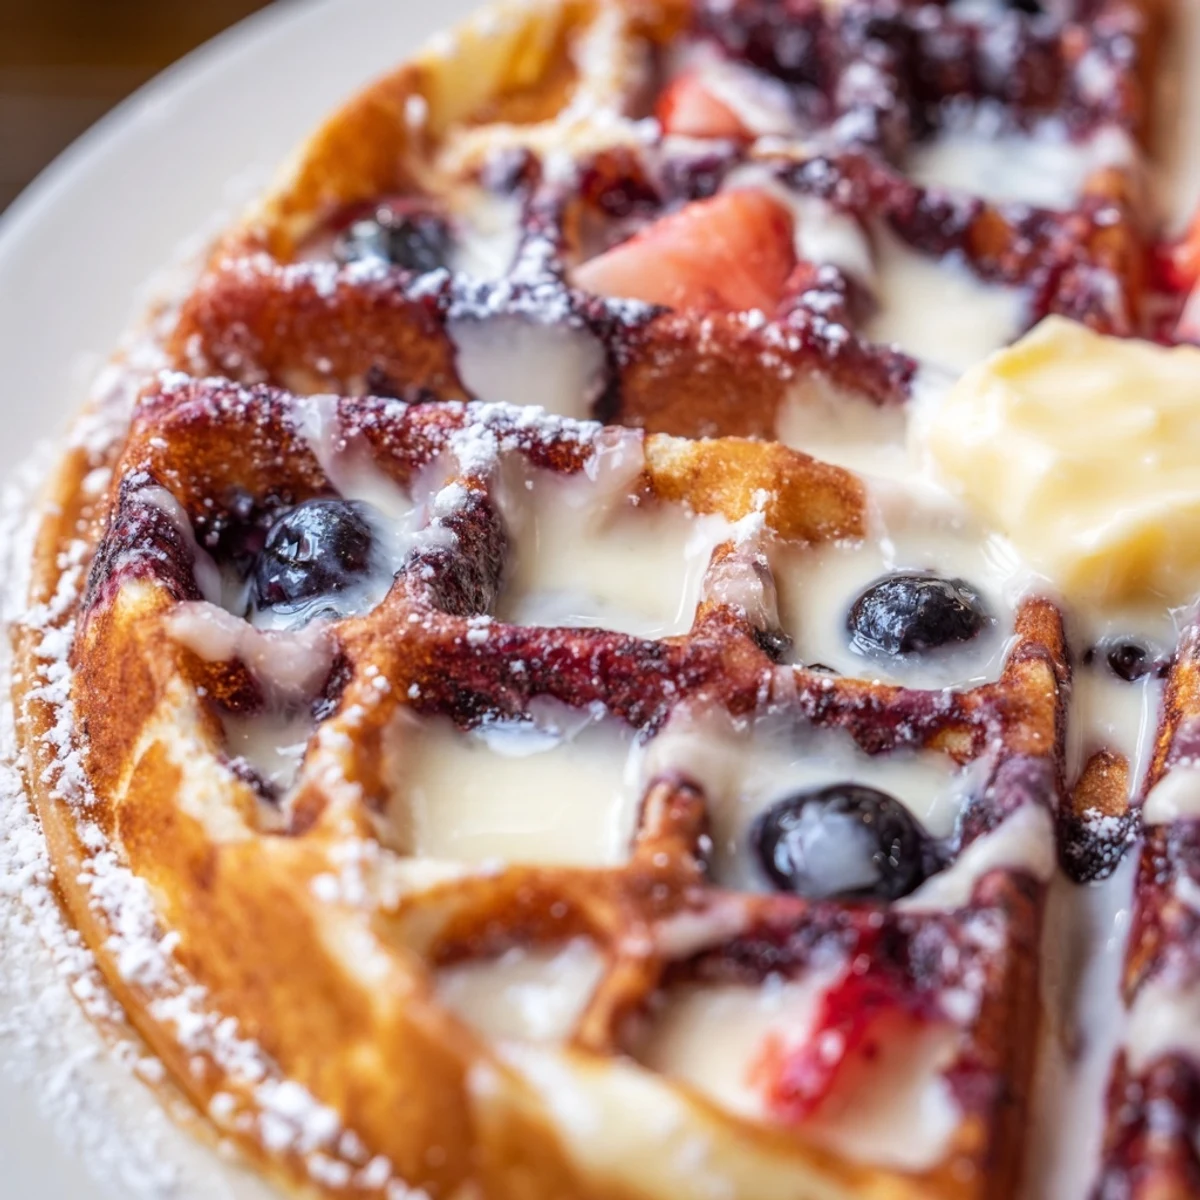
Getting The Marble Effect Right
The swirling technique takes practice. Too much mixing turns the batter muddy pink. Too little leaves you with separate blobs. I learned to drop the batter in a ring pattern, then swirl just twice through the center. The waffle iron does the rest of the work as it closes.
Making Them Ahead
You can prepare both batters the night before and store them in separate containers. Give each a quick stir in the morning. Leftover waffles freeze beautifully layered between parchment paper. Pop them in the toaster for a quick weekday breakfast that tastes like weekend.
Perfect Toppings
Cream cheese glaze is classic, but do not stop there. Whipped cream and fresh strawberries turn these into dessert. Warm maple syrup lets the chocolate notes shine. Even a dusting of powdered sugar makes them elegant enough for company.
- Mix glaze ingredients while waffles cook so it is ready to pour
- Crushed pecans add amazing crunch to every bite
- Warm your syrup slightly for better coverage
 Save to Pinterest
 These waffles turned a regular Saturday into something worth celebrating. Sometimes the simplest mornings become the sweetest memories.
Common Questions
- → How do I achieve the perfect marble effect?
-
Alternate dollops of red velvet and vanilla batters onto the waffle iron, then gently swirl once with a chopstick or knife. Don't over-swirl—the pattern should be distinct, not blended.
- → Can I make these waffles ahead of time?
-
Yes, prepare both batters the night before and store separately in the refrigerator. The red velvet coloring may deepen overnight, which actually enhances the visual appeal.
- → What if I don't have buttermilk?
-
Substitute an equal amount of Greek yogurt thinned with milk, or make your own by adding 1 tablespoon of vinegar or lemon juice to regular milk and letting it sit for 5 minutes.
- → Why do my waffles come out soggy?
-
Soggy waffles usually result from undercooking or opening the iron too early. Ensure your iron is fully preheated and cook until steam subsides, typically 3-5 minutes depending on your waffle maker.
- → Can I freeze leftover waffles?
-
Absolutely. Cool completely, wrap individually in plastic wrap, then freeze in a zip-top bag. Reheat in a toaster or 350°F oven for 5 minutes to restore crispness.
- → What toppings work best with red velvet waffles?
-
Cream cheese glaze echoes traditional red velvet cake flavors, but maple syrup, fresh berries, whipped cream, or even a dusting of powdered sugar all complement the cocoa notes beautifully.
